| User Interface/ Binding Macros to Buttons |
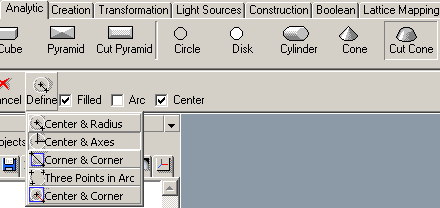
Binding Macros to ButtonsInserting macro buttons into the current user interfaceSome of the Tools in Realsoft 3D are very general. For example, the Analytic tool creates all kinds of analytical objects.The good thing is that you can easily find the tool: no matter if you are creating an analytic sphere, a cube, a cut pyramid or a cylinder, just click the analytic tool and the program makes all analytic specific options available for you. However, if you just want to create certain types of objects, you may prefer a simple button, which selects suitable tool options with one click. You can construct
custom tool palettes using macro buttons, which activate tools with suitable
predefined options.
Using drag & drop to create macro buttonsThe drag & drop interface provides you with an easy way to insert macro buttons into the user interface.1. Activate the desired tool and specify desired options.
2. Press the Ctrl key down and drag & drop the tool to a separate window, into another position in the toolbar, etc. to create a 'shortcut' to the tool.
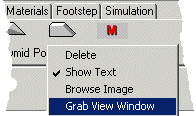
Whenever you click this 'shortcut' button, the original tool is activated with the specified options. The created macro button uses simple image which shows red 'M' letter. You can find this default image from the 'icons' folder. 3. Render nice image
for the tool button using the View window and select the Macro button's
pop-up menu 'Grab View Window'. This saves the contents of the current
view window and attaches the saved image to the macro button.
You may also select
any existing image for the macro button by selecting the 'Browse' menu
item.
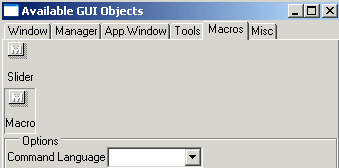
Creating macro buttons manuallyYou can drag & drop any number of macro buttons from the Available Objects window into the current user interface. Each macro button can define an icon, a label, a tool tip and a named macro to be executed when the button is clicked.1. Select the 'Customization/Available Objects Window' pull down menu. 2. Go to the 'Macros' tab of the opened window and click the 'Macro' icon. The macro button specific options are shown.
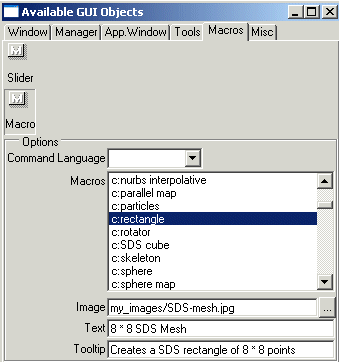
3. Select a macro to be executed from the 'Macro' list. Whenever the button is clicked, the selected macro is executed. You can also Click 'Browse' to locate a desired image for the button. If you don't specify an icon, a default icon will be used. Any image format that Realsoft 3D supports will work (such as JPG, BMP, TGA, GIF, etc.). You can also enter the desired 'Text' and 'Tool tip' strings for the button.
4. When done, drag & drop the macro icon from the Available Objects window into the desired position in the actual GUI (such as a toolbar). Note: Use 'File/Save
As' or 'Environments/Save environment' to save the new customized
GUI.
|


